Prerequisites
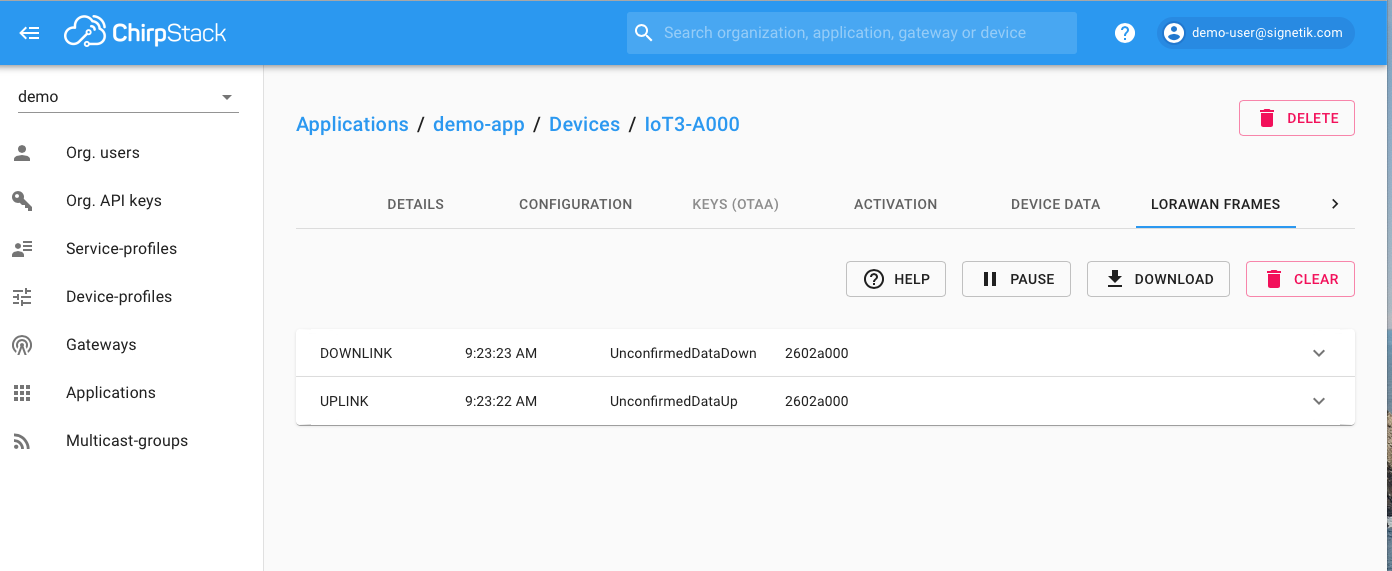
Ensure your device is connected and posting data to ChirpStack. See Device to ChirpStack integration
Setup SNS and SQS on AWS
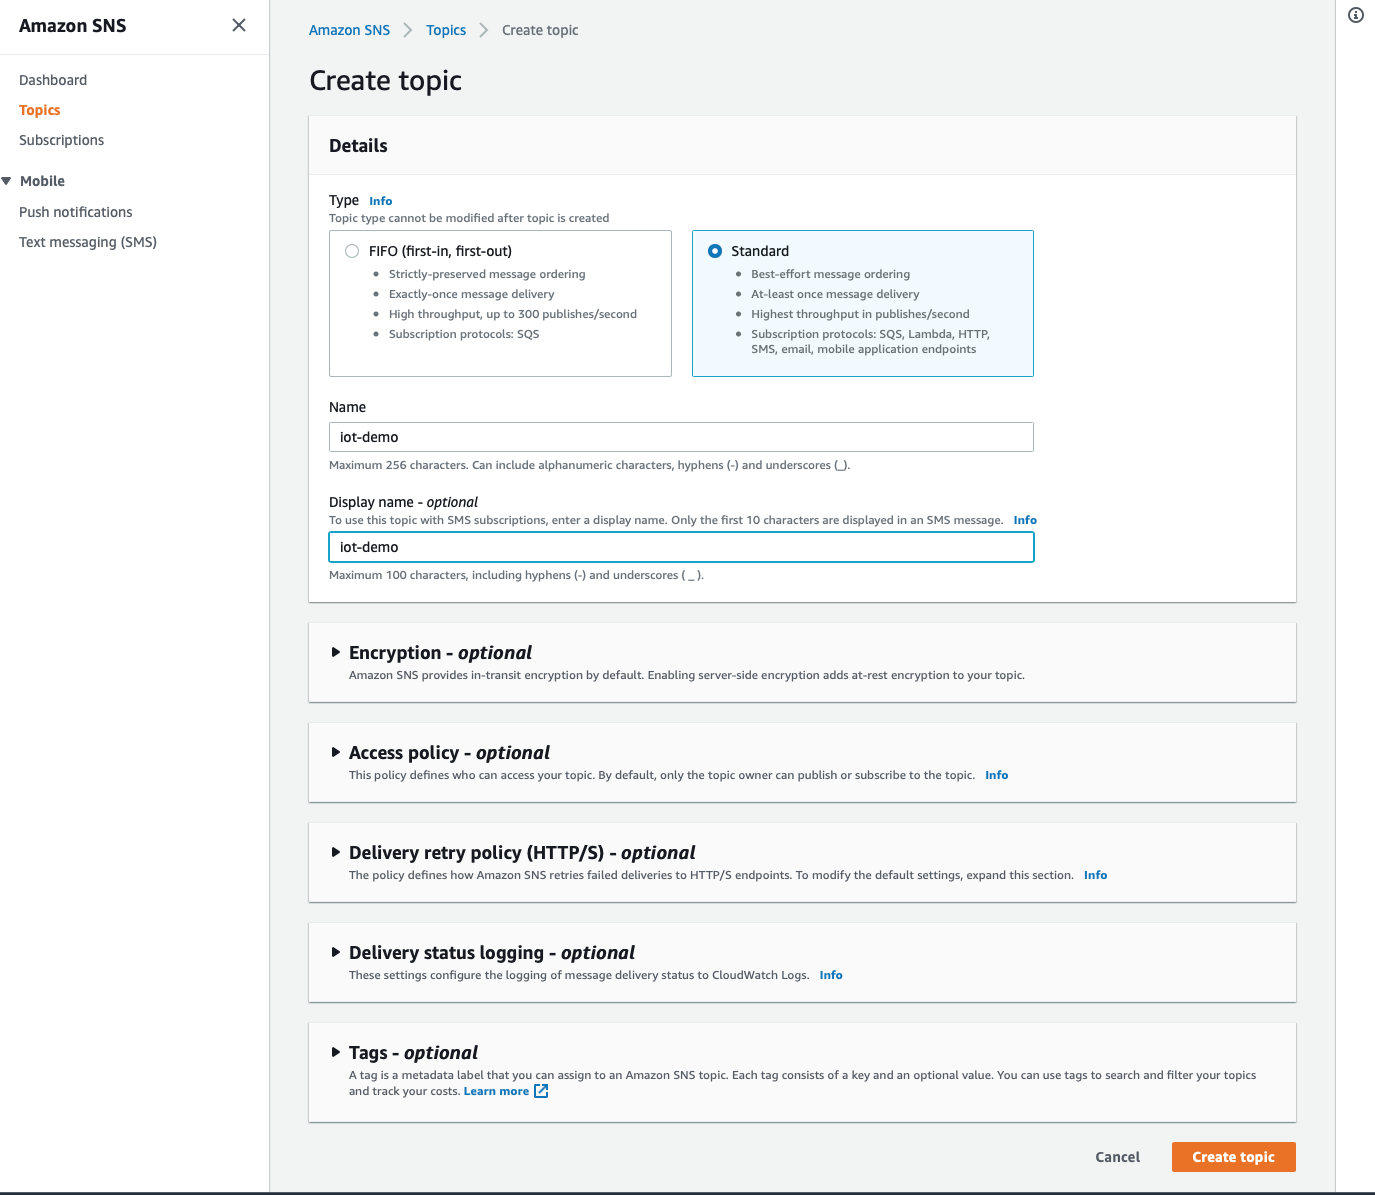
Setup SNS
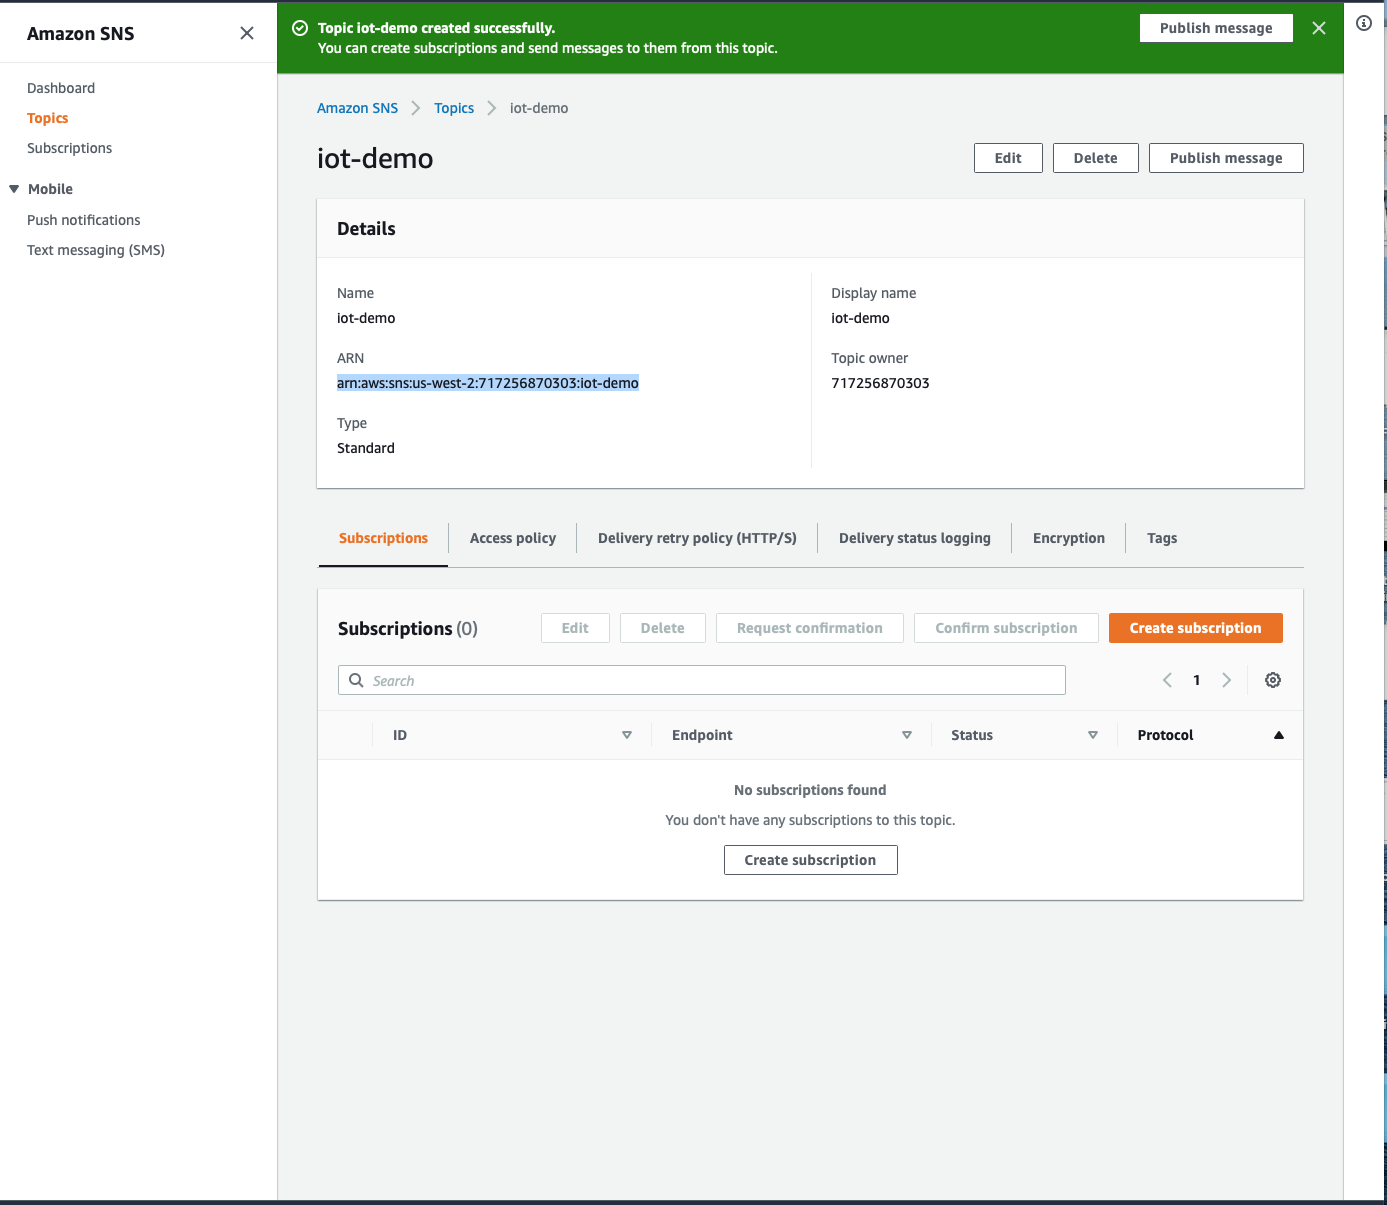
- Create SNS topic. Standard type, provide convenient name, leave everything else as default. Note topic ARN, it will be required for SQS setup.
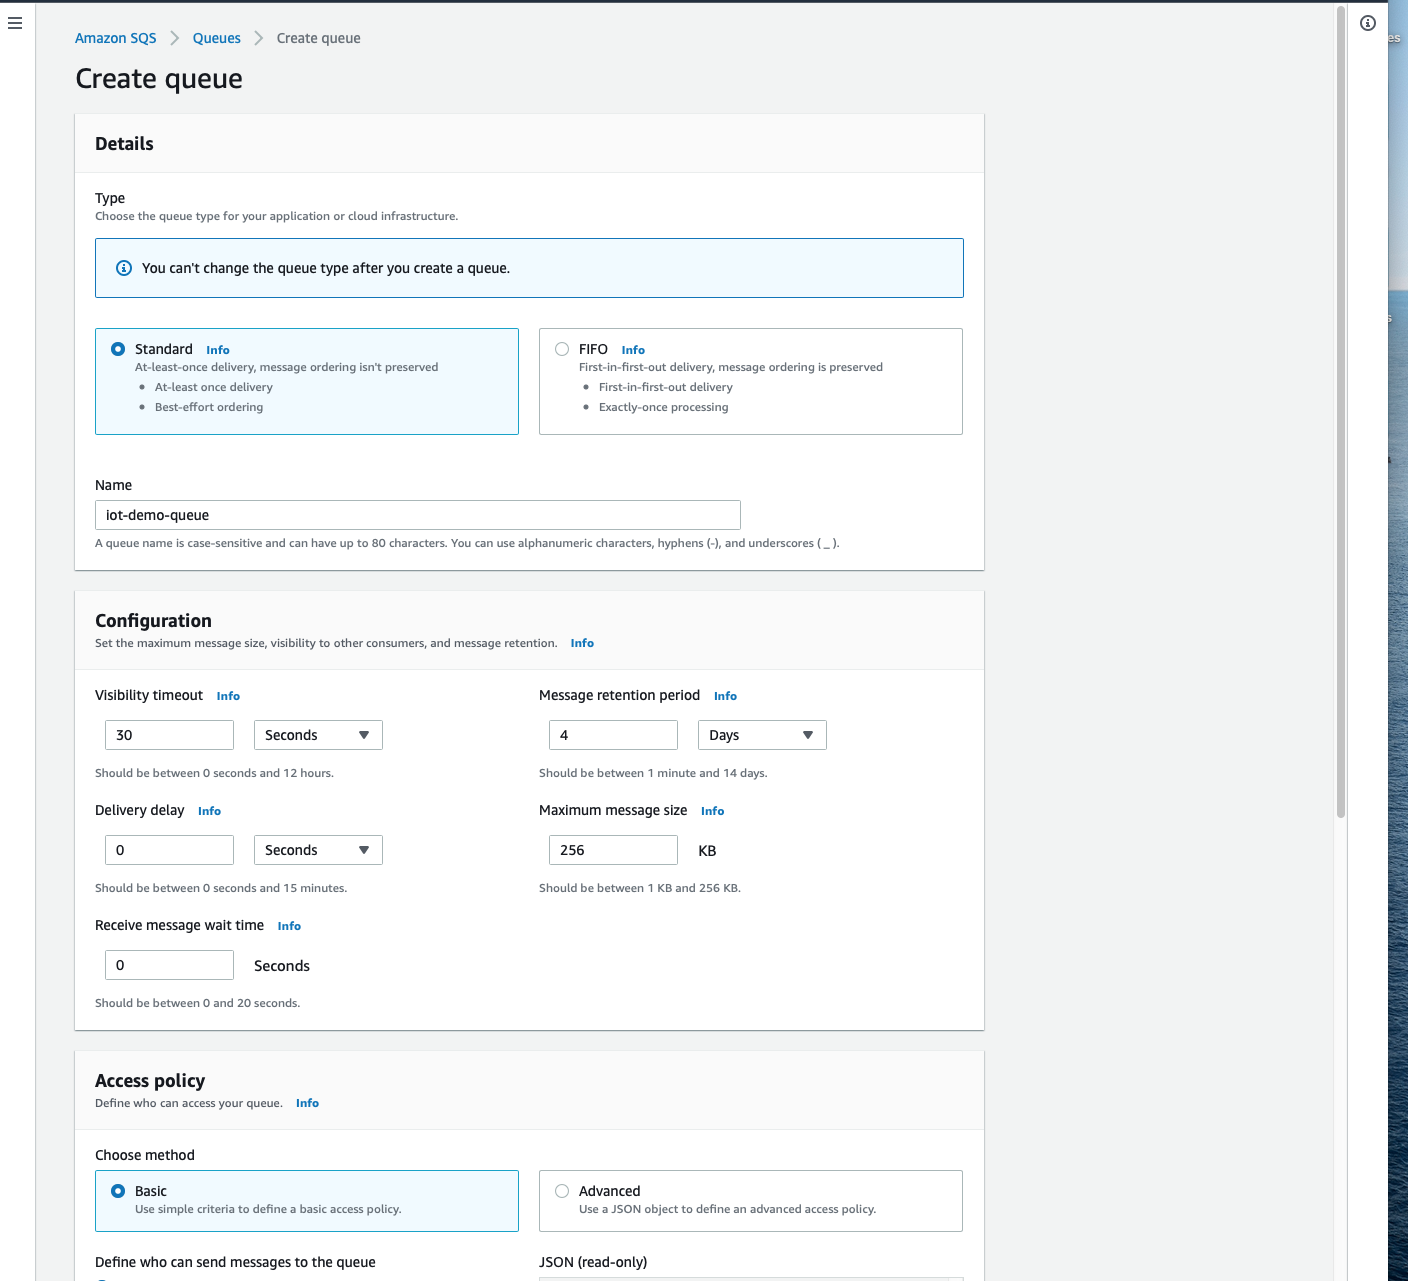
Setup SQS
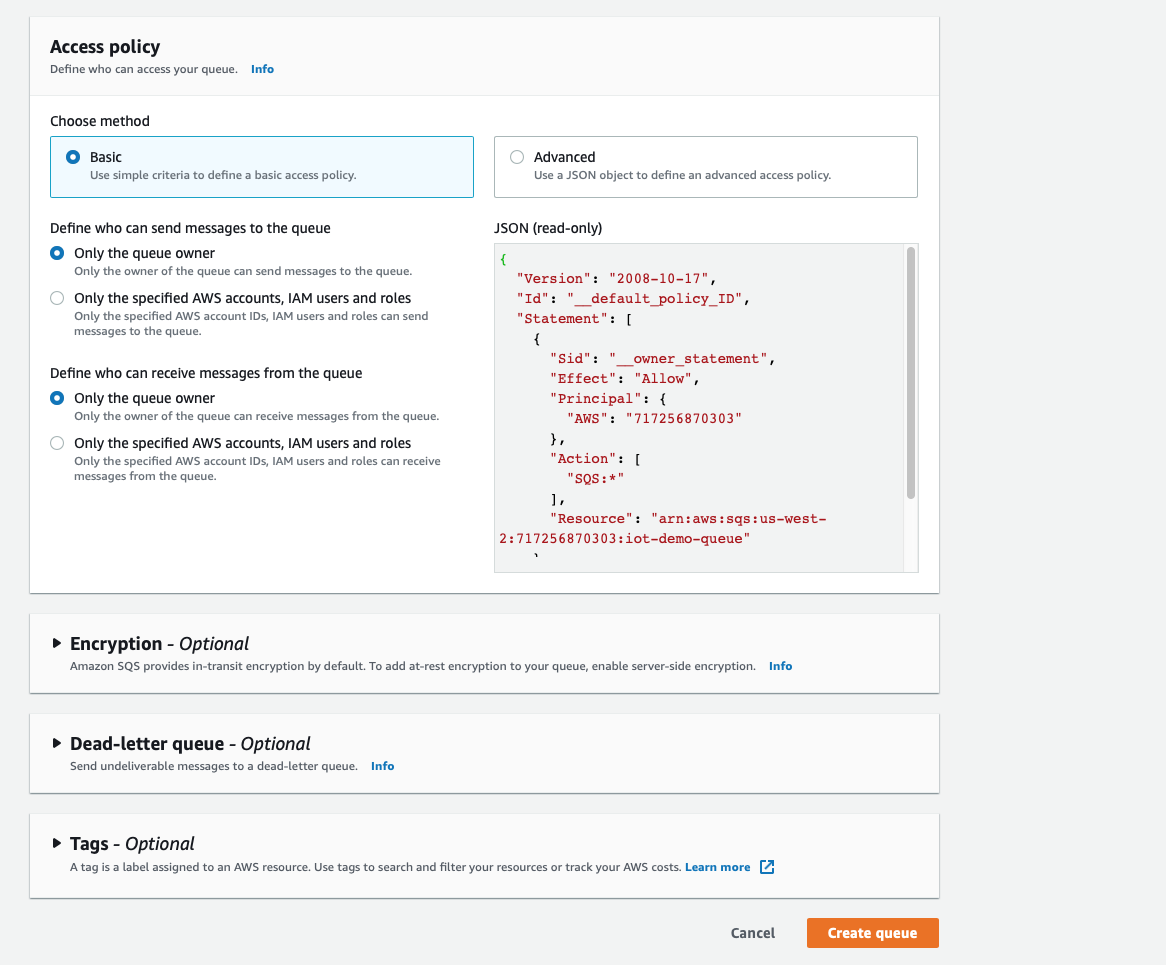
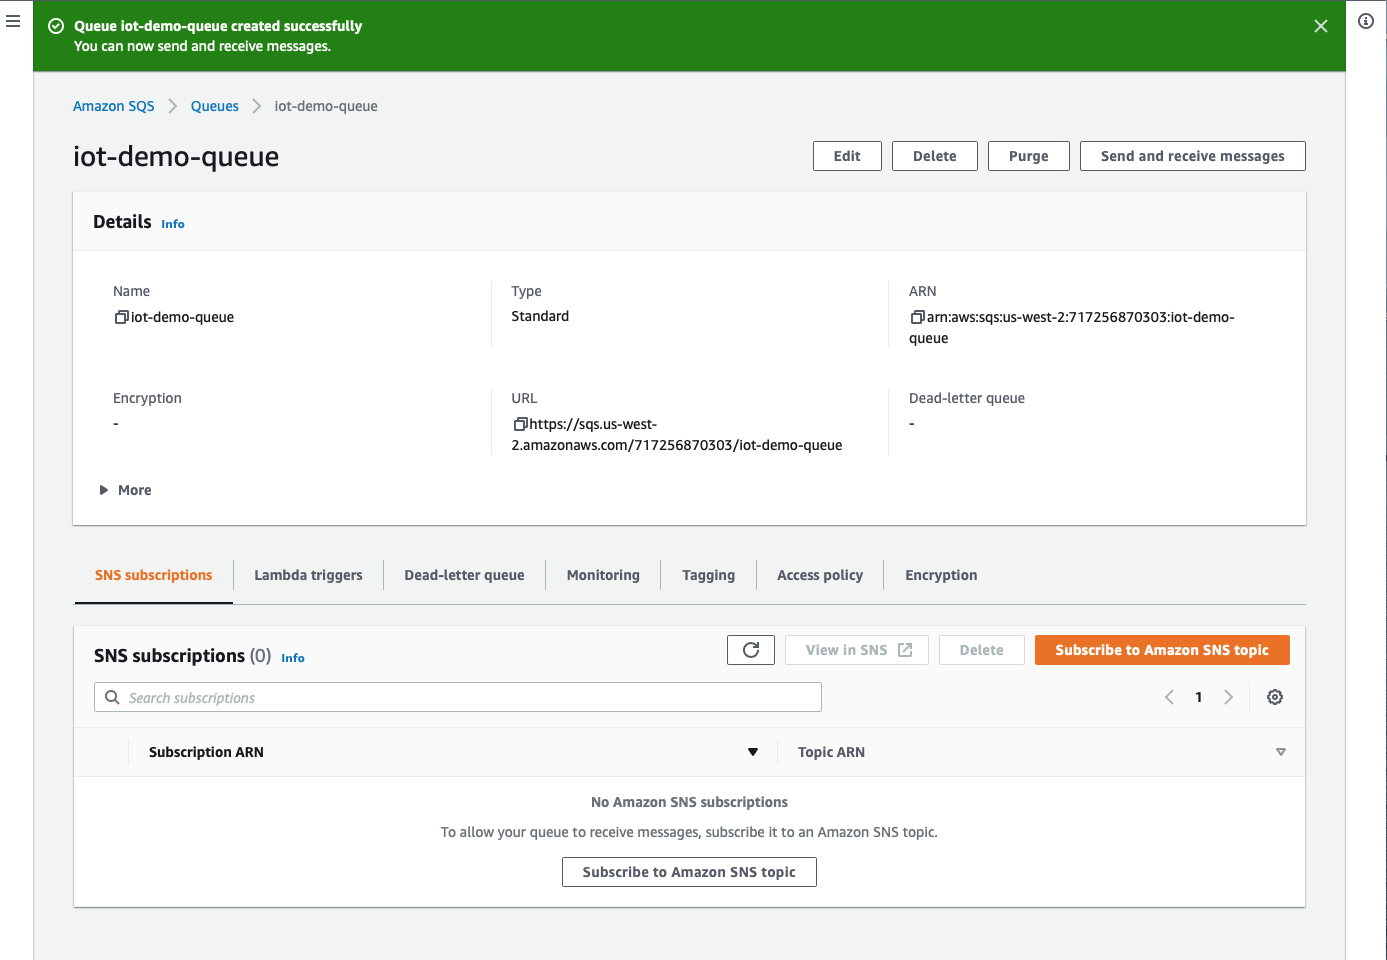
- Create SQS queue. Standard type, provide convenient name, everything else by default.
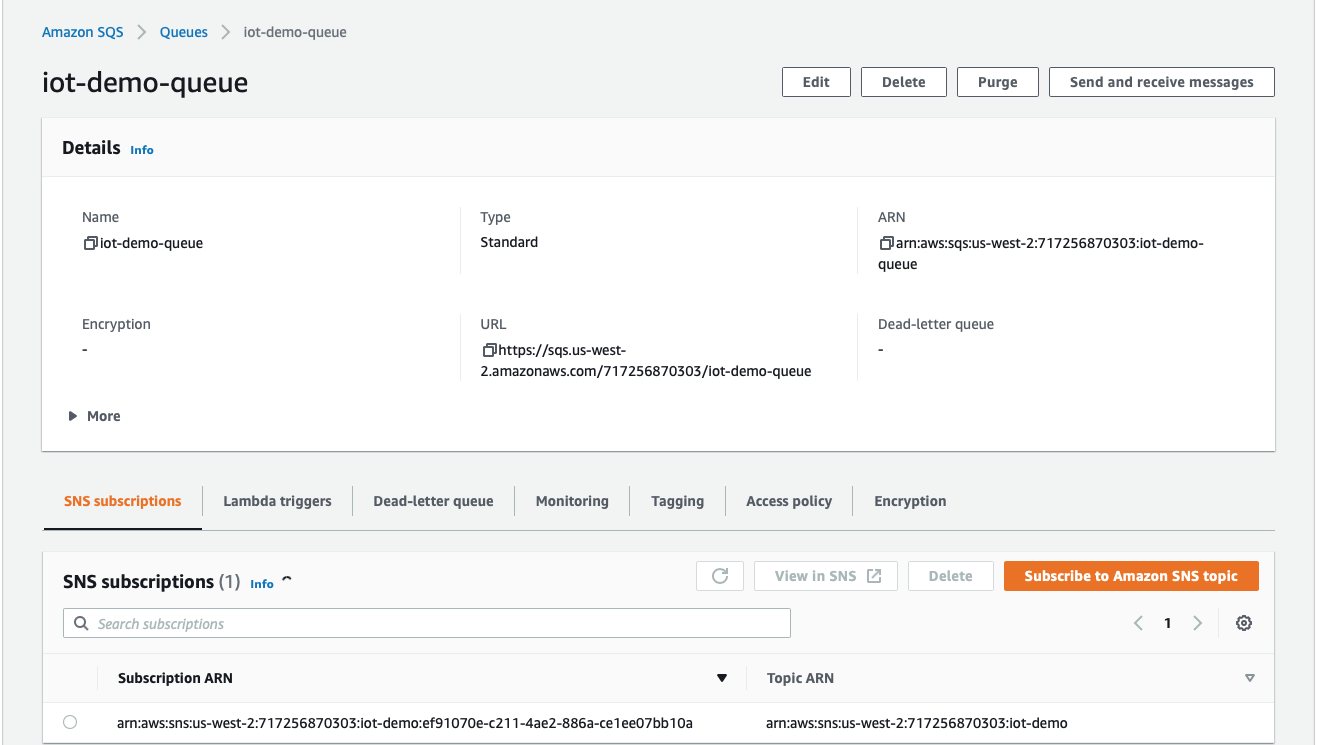
- Enter into the newly created queue.
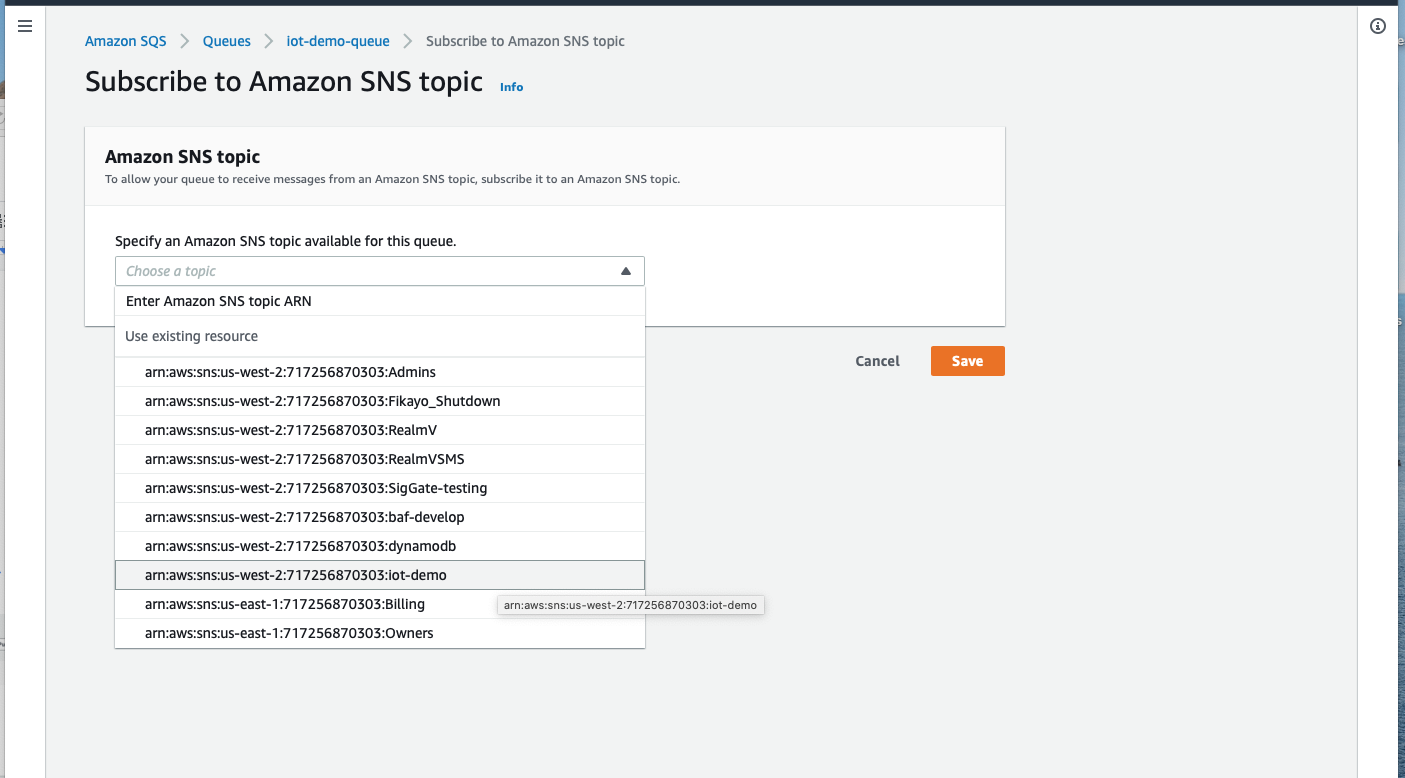
- Click "Subscribe to Amazon SNS topic" on the bottom part.
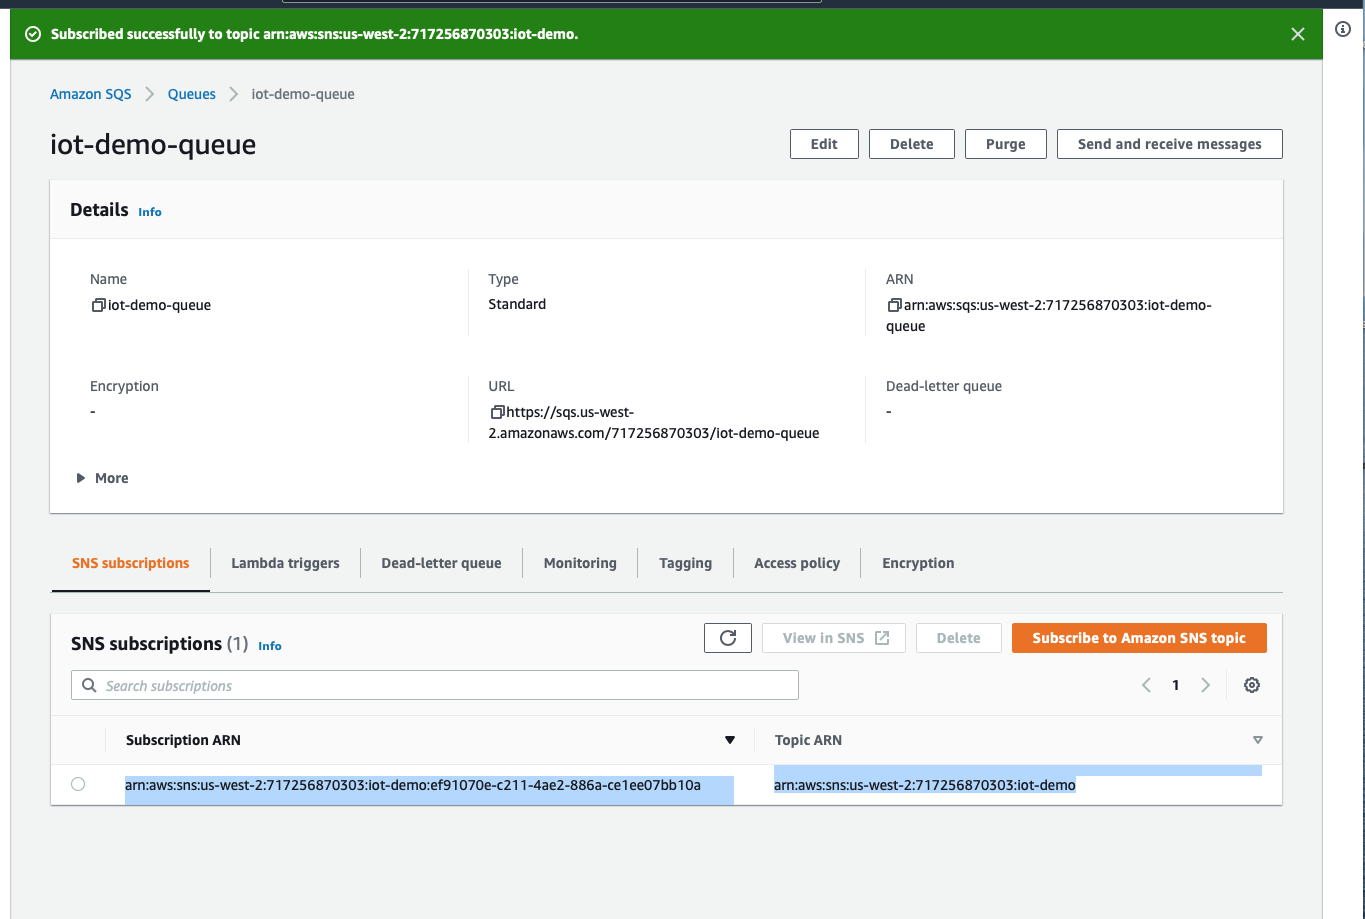
- Select from drop-down menu ARN of newly created SNS topic or select entry "Enter Amazon SNS topic ARN" and copy/paste ARN into additional field. Click save.
Connect SNS to SQS
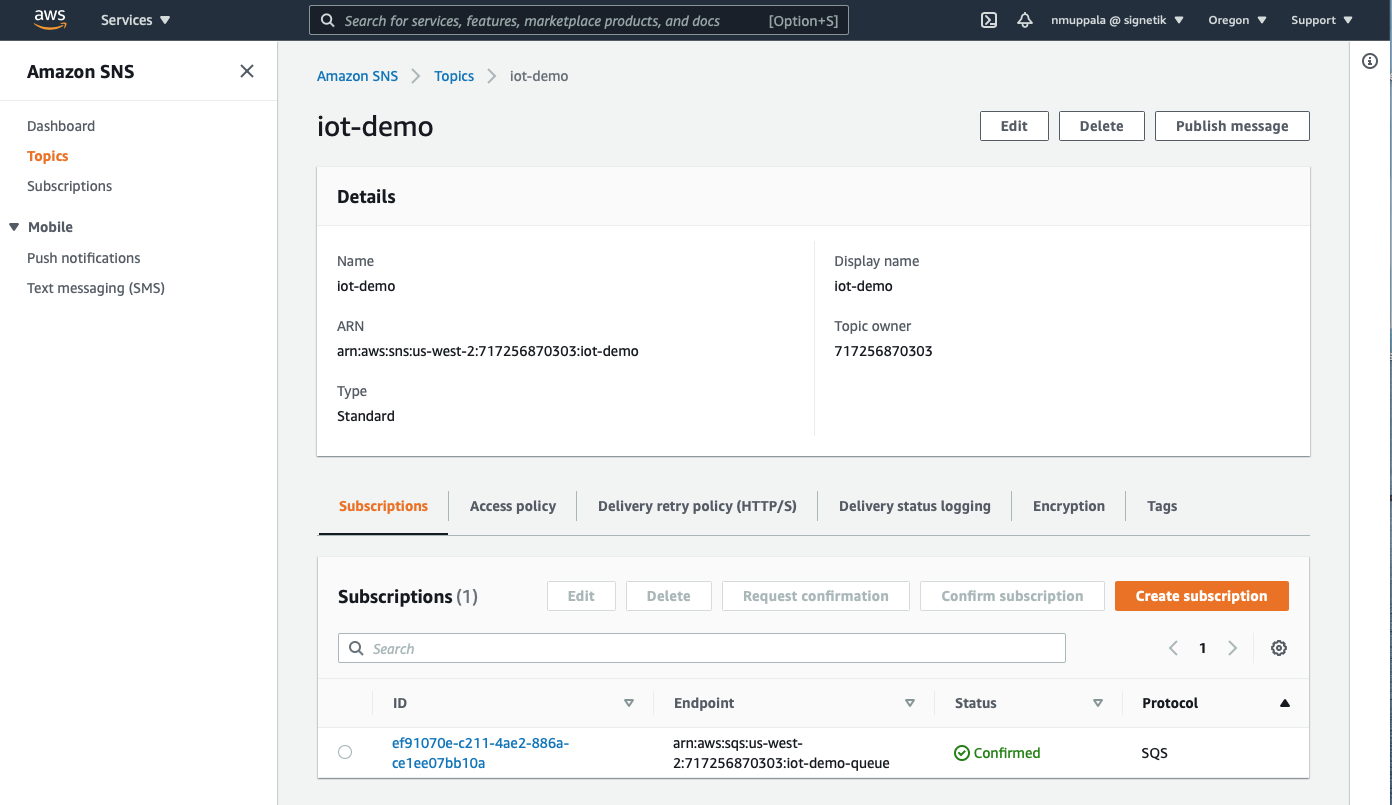
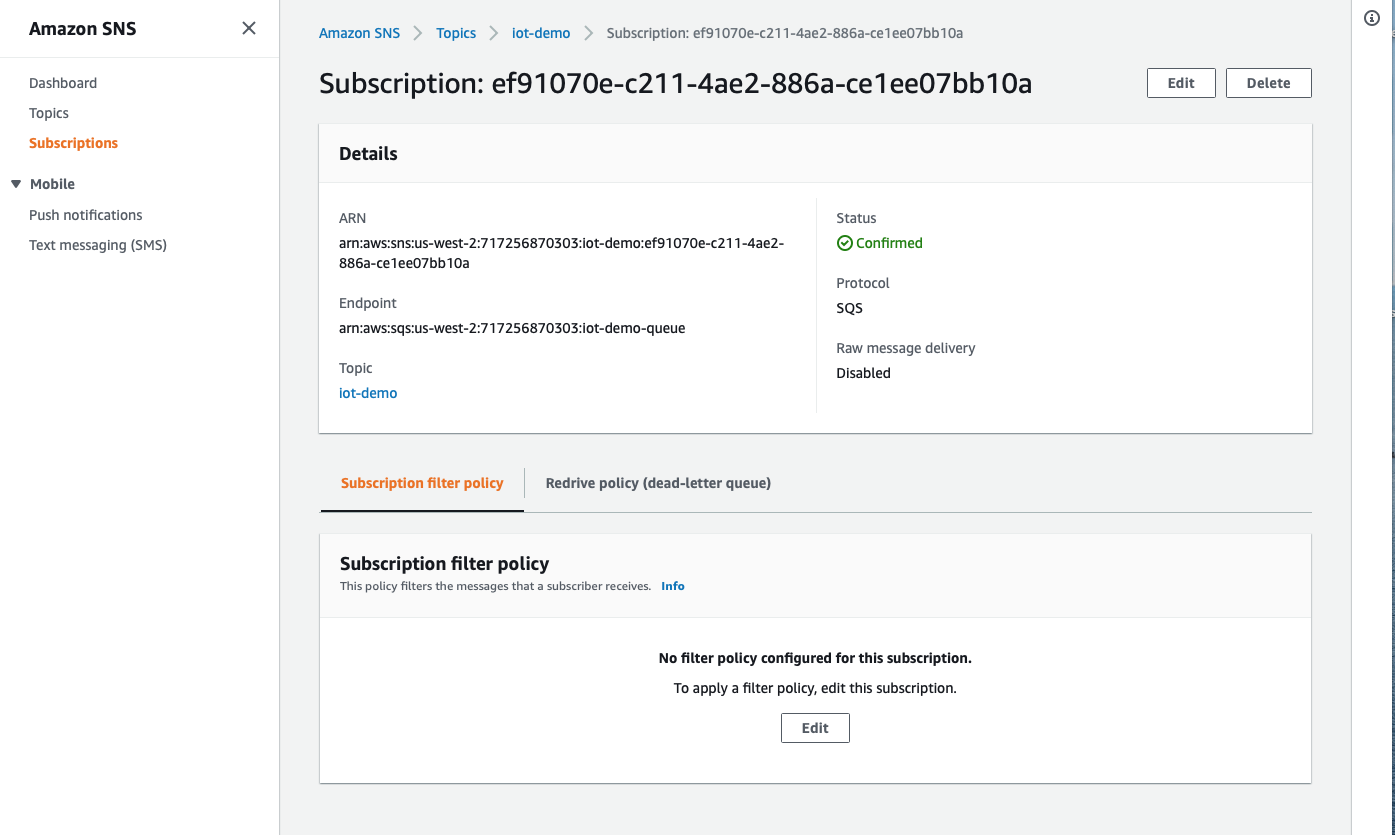
- Go back into SNS and enter the newly created topic. The newly created subscription will appear under Subscriptions. Note the endpoint matches the arn of the queue created in the previous step.
- Click on ID value in ID column in subscription row.
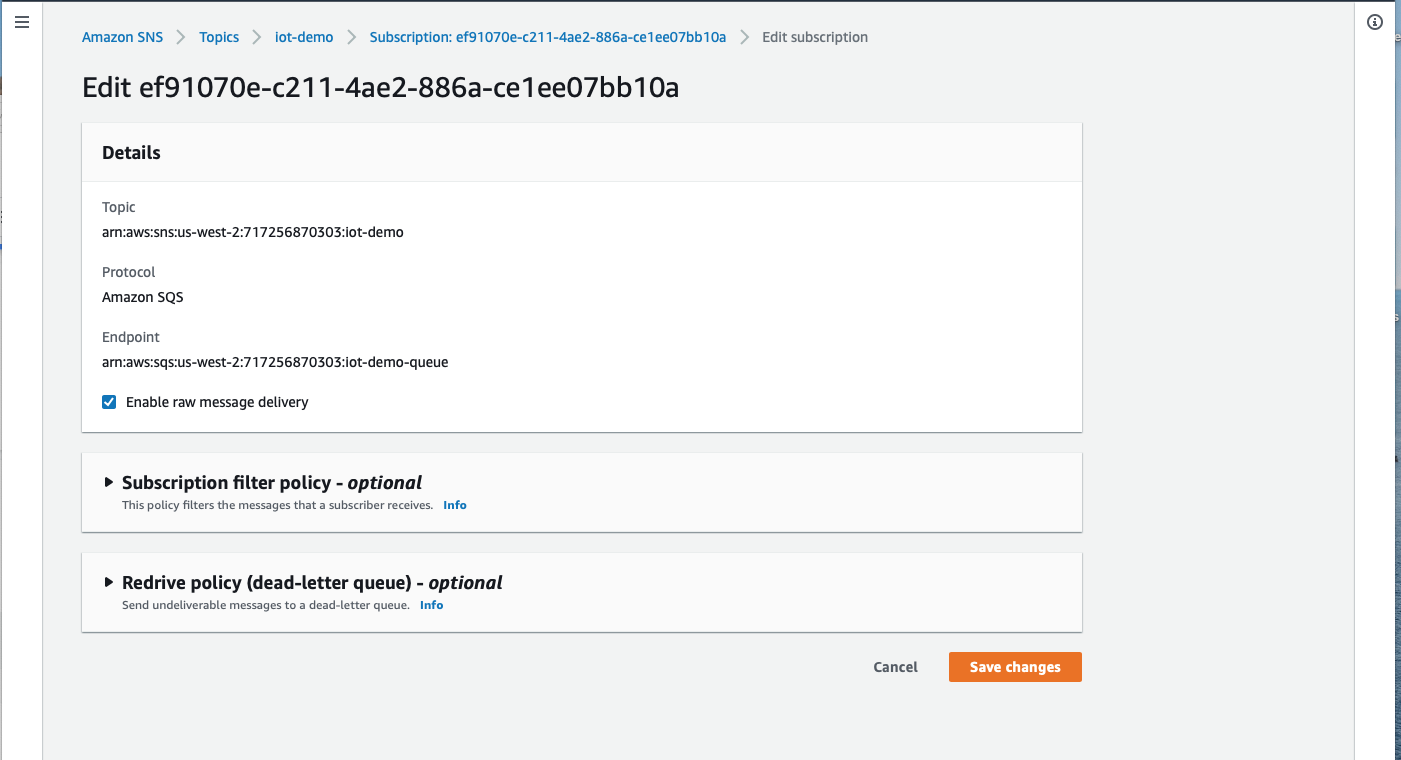
- Click Edit on opened form.
- Check "Enable raw message delivery". This will remove anything AWS specific from message and message will be in the form as it was sent originally.
- Click Save Changes.
Connect ChirpStack to AWS SNS/SQS
- Select Applications on Left pane
- Select the Application that will be integrated with AWS SNS/SQS
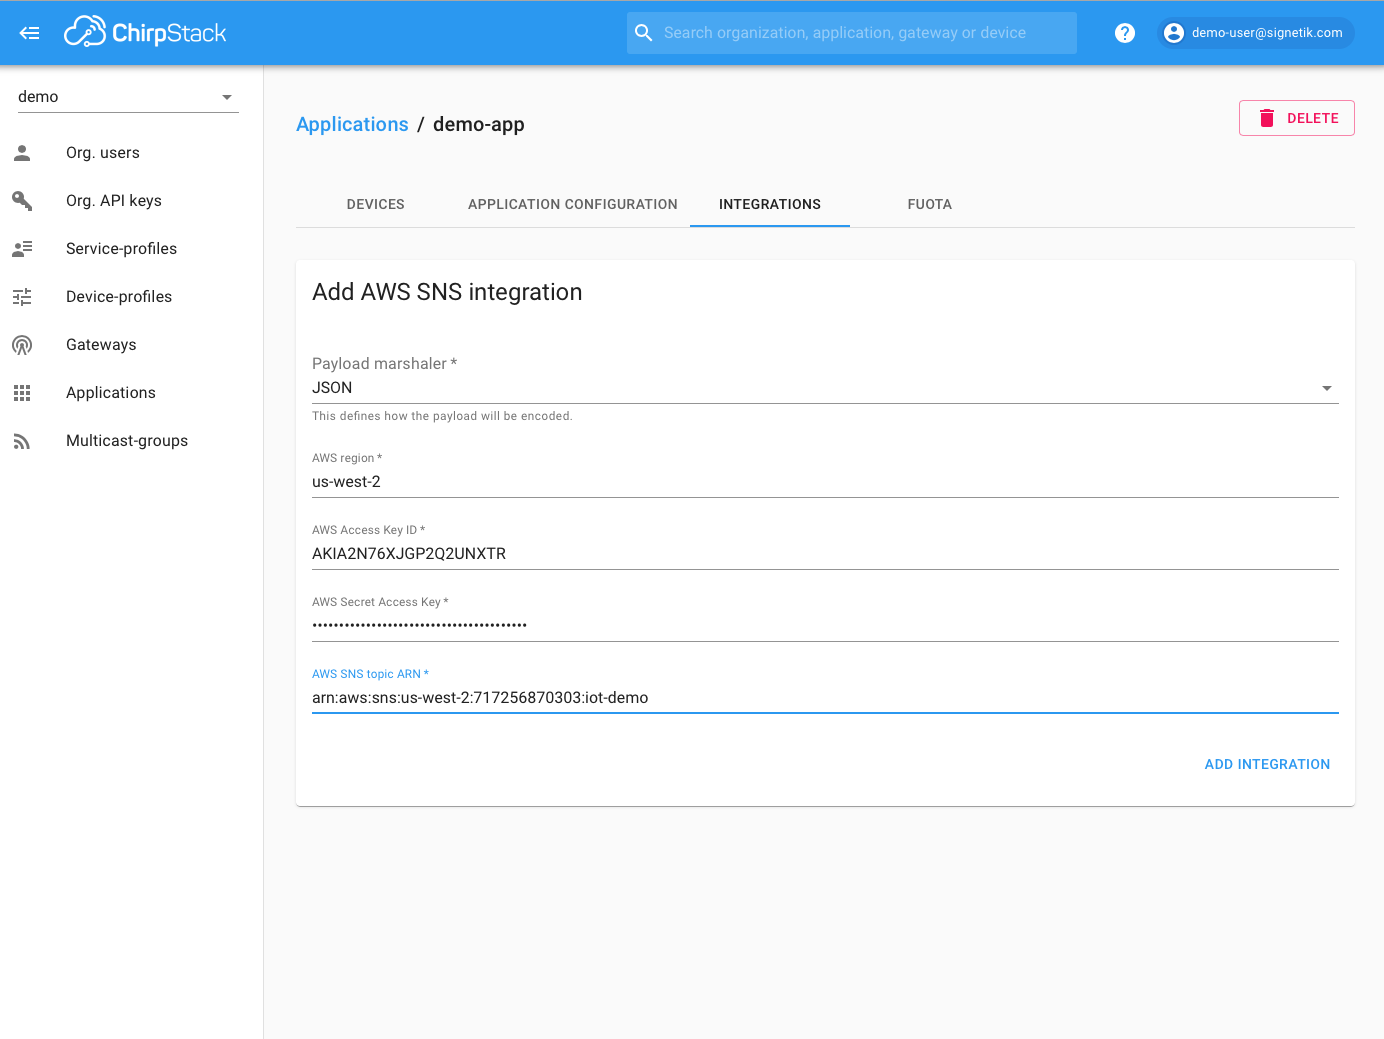
- Select Add in SNS tile.
- Enter details in the Integration form
- JSON for Payload
- AWS region corresponds to where the IAM account, SNS, SQS are. us-west-2
- AWS Access Key ID, AWS Secret Access Key correspond to the user who created SNS, SQS
- AWS SNS topic ARN comes from the "Create SNS topic" step earlier in this document.
View Data from Device on AWS SQS
- Ensure data traffic on device page on ChirpStack
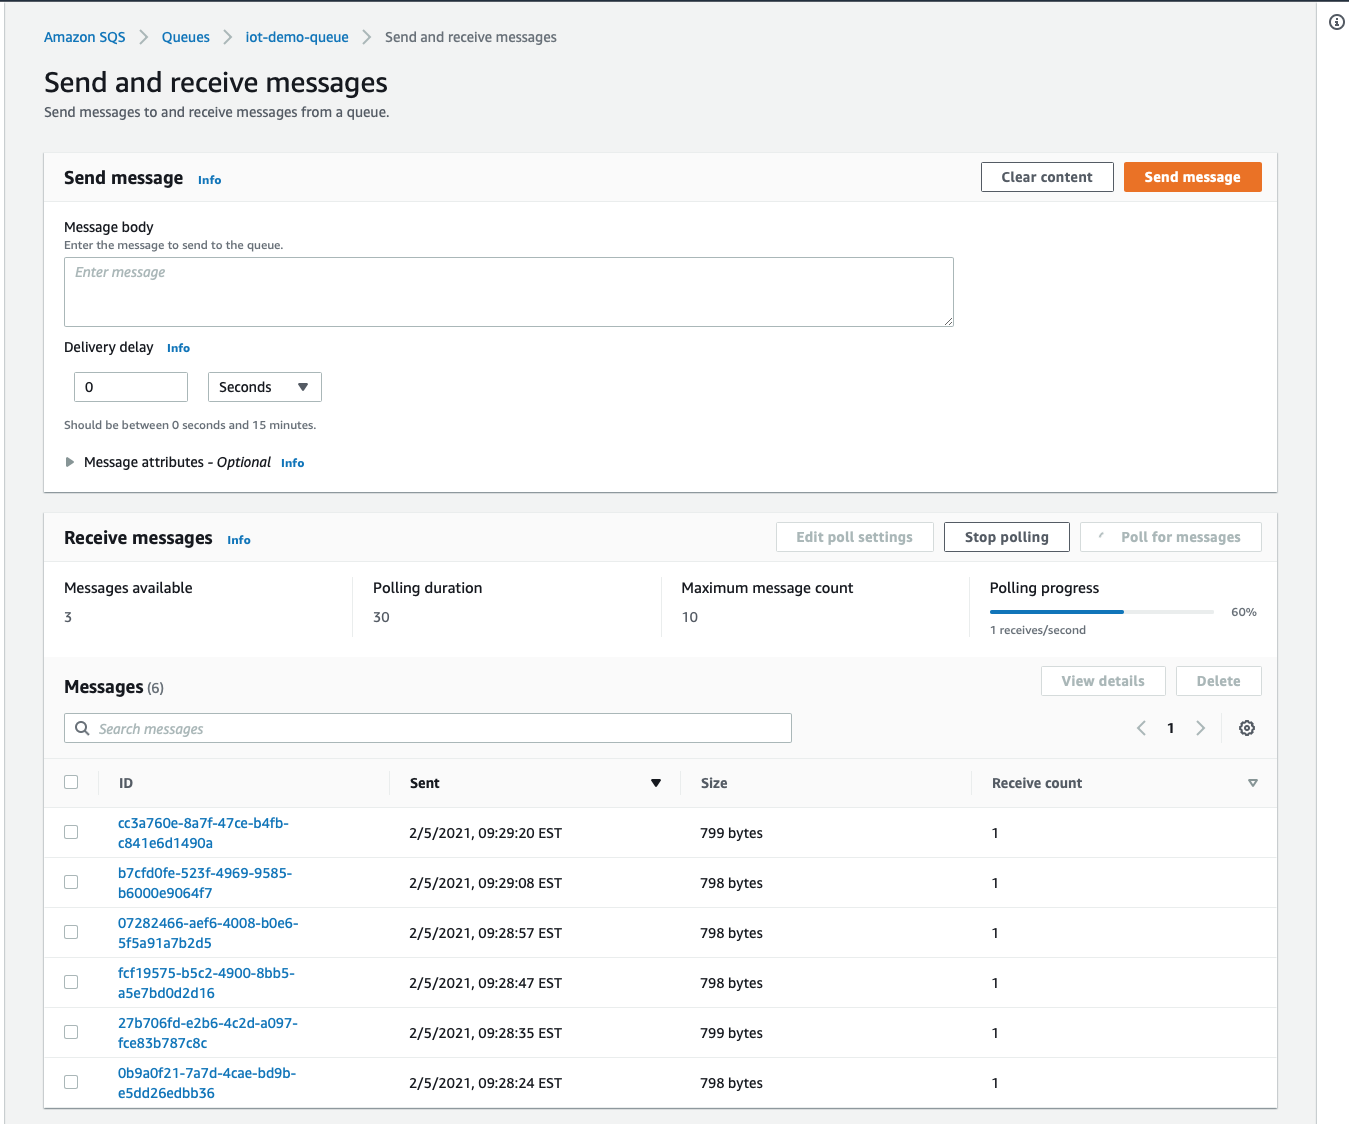
- Go to SQS Queue
- Click on Send and Receive messages a the top right
- In the Receive messages window, Click on "Poll for messages" at the right
- Edit poll settings as needed. By default, it will poll for 10 messages, and list the messages in the same window.
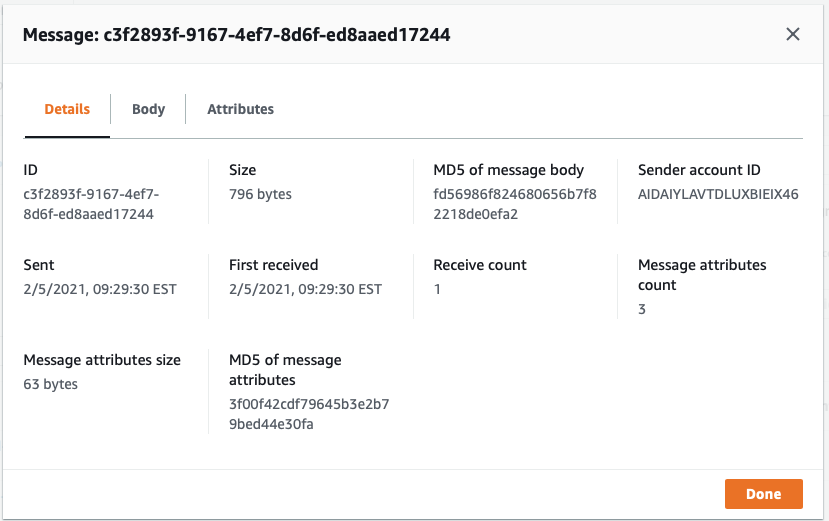
- To view details of a message, click on the message ID
- Details tab shows statistics about the message
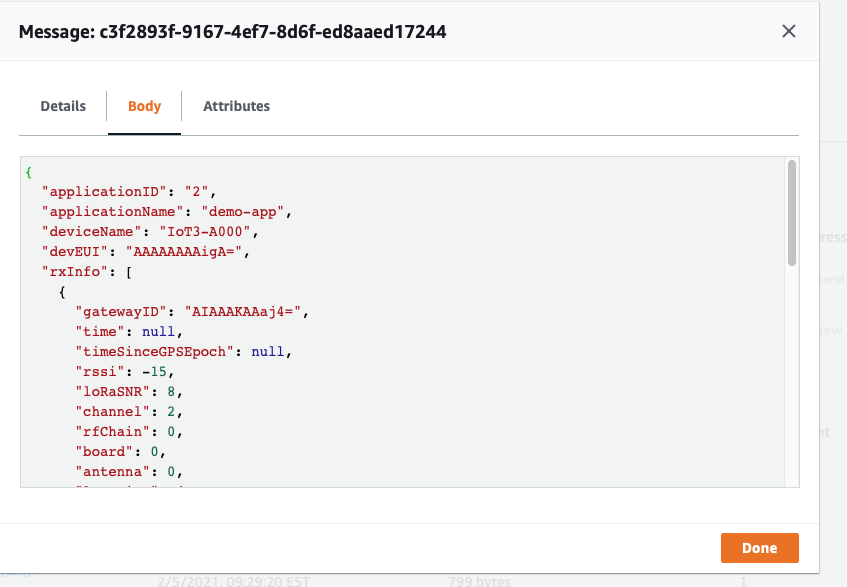
- Body tab shows the json message as received from ChirpStack
- Entirety of a message body looks like this
-
{

"applicationID": "2",

"applicationName": "demo-app",

"deviceName": "IoT3-A000",

"devEUI": "AAAAAAAAigA=",

"rxInfo": [

{

"gatewayID": "AIAAAKAAaj4=",

"time": null,

"timeSinceGPSEpoch": null,

"rssi": -15,

"loRaSNR": 8,

"channel": 2,

"rfChain": 0,

"board": 0,

"antenna": 0,

"location": {

"latitude": 0,

"longitude": 0,

"altitude": 0,

"source": "UNKNOWN",

"accuracy": 0

},

"fineTimestampType": "NONE",

"context": "BCHRbA==",

"uplinkID": "/jl0gfbIRgWqAPe2MoW2QQ==",

"crcStatus": "CRC_OK"

}

],

"txInfo": {

"frequency": 902700000,

"modulation": "LORA",

"loRaModulationInfo": {

"bandwidth": 125,

"spreadingFactor": 10,

"codeRate": "4/5",

"polarizationInversion": false

}

},

"adr": true,

"dr": 0,

"fCnt": 386,

"fPort": 1,

"data": "ZAEAABDiAJYAAAAB",

"objectJSON": "",

"tags": {},

"confirmedUplink": false,

"devAddr": "JgKgAA=="

}
Conclusion
This concludes the demonstration of sending messages from LoRa end devices to AWS via ChirpStack. Futher integrations can subscribe to the SQS queue to get access to the messages.
Comments
0 comments
Please sign in to leave a comment.